Removing the hair from your upper lip is a common thing that many people do to improve their appearance. Let’s face it, you look better with a smooth upper lip, but performing this procedure on a regular basis can be annoying.
It can also be uncomfortable, depending on the means you use to get the job done. Regarding the approach you take to accomplishing this, there are several popular methods, and choosing one is a matter of convenience and personal preference.
These methods include the use of chemical creams, electric trimmers and epilators, threading, waxing, sugaring, and light energy treatments.
We will detail for you a basic method that can be done at home. This method will yield good results with a minimum amount of discomfort and employs several different techniques to give you the results you seek.
Here is the step-by-step how-to approach that you can do regularly to get that smooth upper lip in a cost-effective, relatively pain-free manner. We will also talk a bit about other, more exotic methods that give great results but cost a bit more to perform.
Hair Removal Creams
These instructions are for your basic hair removal cream intended for use on the face (do not use removal creams intended for other body areas on your face). Treatment times can vary by product, so be sure to follow the package directions. The example product we used is the Nair Hair Remover Precision Kit for Face and Upper Lip. The Nair product includes Moroccan argan oil in the formulation to soothe the skin during treatment.
1. The upper lip should be cleaned and free of soap residue and makeup. Wash your face with a mild soap, rinse away the soap and makeup with warm water, and gently pat dry.
2. Before going full tilt on your upper lip, you should do a skin test on a less sensitive area such as your cheek. Apply the product as follows to a small area (like a square centimeter) and wait 24 hours to make sure you do not have any negative skin reactions like excessive redness or swelling.
3, Apply the product with the included applicator. These are usually either plastic or a silicone-coated plastic stick with a chisel-like tip.
Spread an even, thick coat of the cream across your lip making sure to keep the product off of your lips and out of your mouth. Do not rub it in; it will work just fine without that.
Yes, it will smell because the product contains thiols that react and break down the hair shaft.
4. After about 5 minutes, gently wipe away a small area (such as at the corners of your mouth) with a soft cloth or cotton ball to ensure that the product has finished working. If the hair removal is incomplete, wait for another 2 to 3 minutes and check again the same way.
5. Do not let the product sit on your skin for more than 10 minutes, otherwise, you can get a rather unpleasant burn.
6. Gently wipe away the cream by swiping away from the center of your face a little at a time, gradually working your way to the middle under your nose. Just wipe, don’t rub.
7. With lukewarm water and no soap, thoroughly wash the treated area. Use lots of water and be careful not to get any in your mouth, your nose, or (dear God!) in your eyes.
8. Pat the treated area dry with a soft cloth. Again, as before, do not rub. Just pat.
9. You should see that all your upper lip hair has washed away with the cream. This chemical treatment removes the hair but also removes the acid mantle of the skin since the chemical reactants are alkaline (like bleach).
10. This is a protective acidic film that coats your skin and is made from sebum (oil) and sweat. Its pH is anywhere from 4.5-6.2 and is protective and antibacterial. Since the wash and treatment, that layer is now gone, so applying a moisturizing cream that is pH-balanced will help to restore your skin pH and reduce redness and irritation following the treatment.
There are many moisturizers that will work for this purpose, just be sure to choose one that is marketed as a low-pH moisturizer. We like low-pH moisturizer products by Aveeno and Cetaphil since they are commonly available and work really great, but that the market is full of similar products so choose something that works for you. Just be sure that the bottle says it is low-pH (in the range of your skin’s acid mantle).
Most low-pH balanced creams run around a pH of 4.7 up to a more neutral 6.4.
Treatment with a chemical cream can be done somewhat frequently, but should not be used any sooner than 72 hours since the last treatment. If you find that there are a few spots that the cream missed, you can follow up with a fresh blade razor, an electric razor/trimmer with relatively new blades, or an epilator if you wish.
However, you should wait about 24 hours before doing any follow-ups to give your skin some time to rest.
Other Methods
Now, let’s talk about more traditional and exotic methods.
Threading and Tweezing
Threading is an age-old, low-tech approach to hair removal. It is similar to tweezing since it is a hair plucking method.
This technique is favored by many people worldwide since, until the last 50 years or so, cosmetic tweezers were not necessarily available everywhere in the world. Threading consists of using a dampened thread to wind around the base of the hair shaft a few times, then pluck it out.
This hurts, like tweezing, but the results tend to last longer than chemical creams since the roots of the hairs are removed. If you don’t like tweezing or threading, battery-powered epilators will do the same thing since an epilator is basically a motorized tweezer.
Intense Pulsed Light (IPL) Devices

For the more exotic approaches, the market is now awash with IPL (intense pulsed light) devices that use wavelengths of light to heat and stunt the development of hair follicles. This can be an excellent solution for your upper lip, but these devices will set you back a bit.
Be sure to purchase devices that are specifically for facial use, otherwise they may be too bulky for your purposes.
See Related Topic: Brazilian Laser Hair Removal at Home: Top 5 Devices
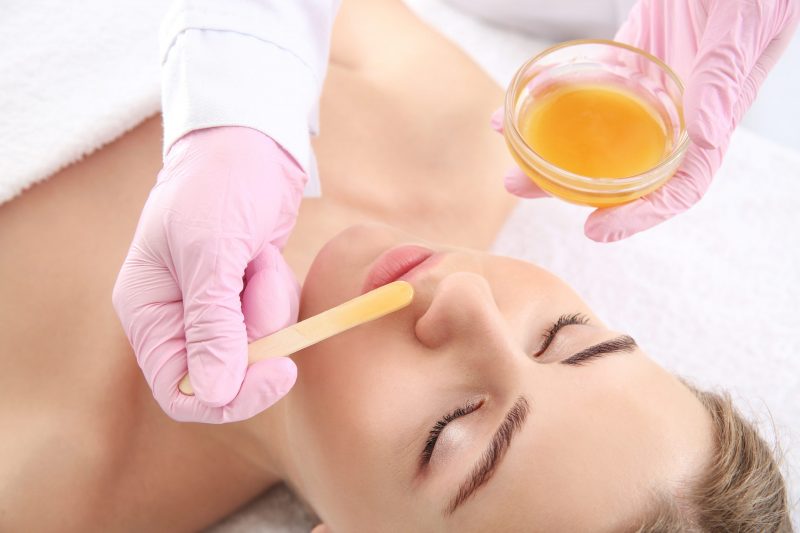
Waxing, Sugaring, and Lasers, oh my!
Lip waxing, sugaring, and laser treatments are more advanced and, in many ways, more effective means of upper lip hair removal. The drawback of these techniques is cost since they can only be performed safely by trained beauticians in a salon.
It may be obvious how waxing works, but this is best performed by a professional since a few mistakes can leave you with scars. Sugaring is soft of a new fad in hair removal and uses a sugar-based exfoliant to remove hair and dead skin cells, but is also exclusively done in salons.
The final exotic technology is laser hair treatment, which is not IPL but actual lasers. That being said, the devices are expensive and only salons and dermatology clinics buy them, so there is also a cost associated with laser treatments.
They do, however, produce longer-lasting results than the other methods.
Wrap-Up
The bottom line in upper lip hair removal (lol) is that passable results can be obtained by most methods if performed correctly. There are differences in the longevity of the effect and those differences match up well with costs. Long-term, higher cost, short-term, lower cost.
Which one you pick is up to you and your budget.